Invisible mannequin: how to get the effect and when to use it
The ghost mannequin is the standard in fashion catalogs. How to do it step by step, what gear you need, the most common mistakes and when something else makes more sense.
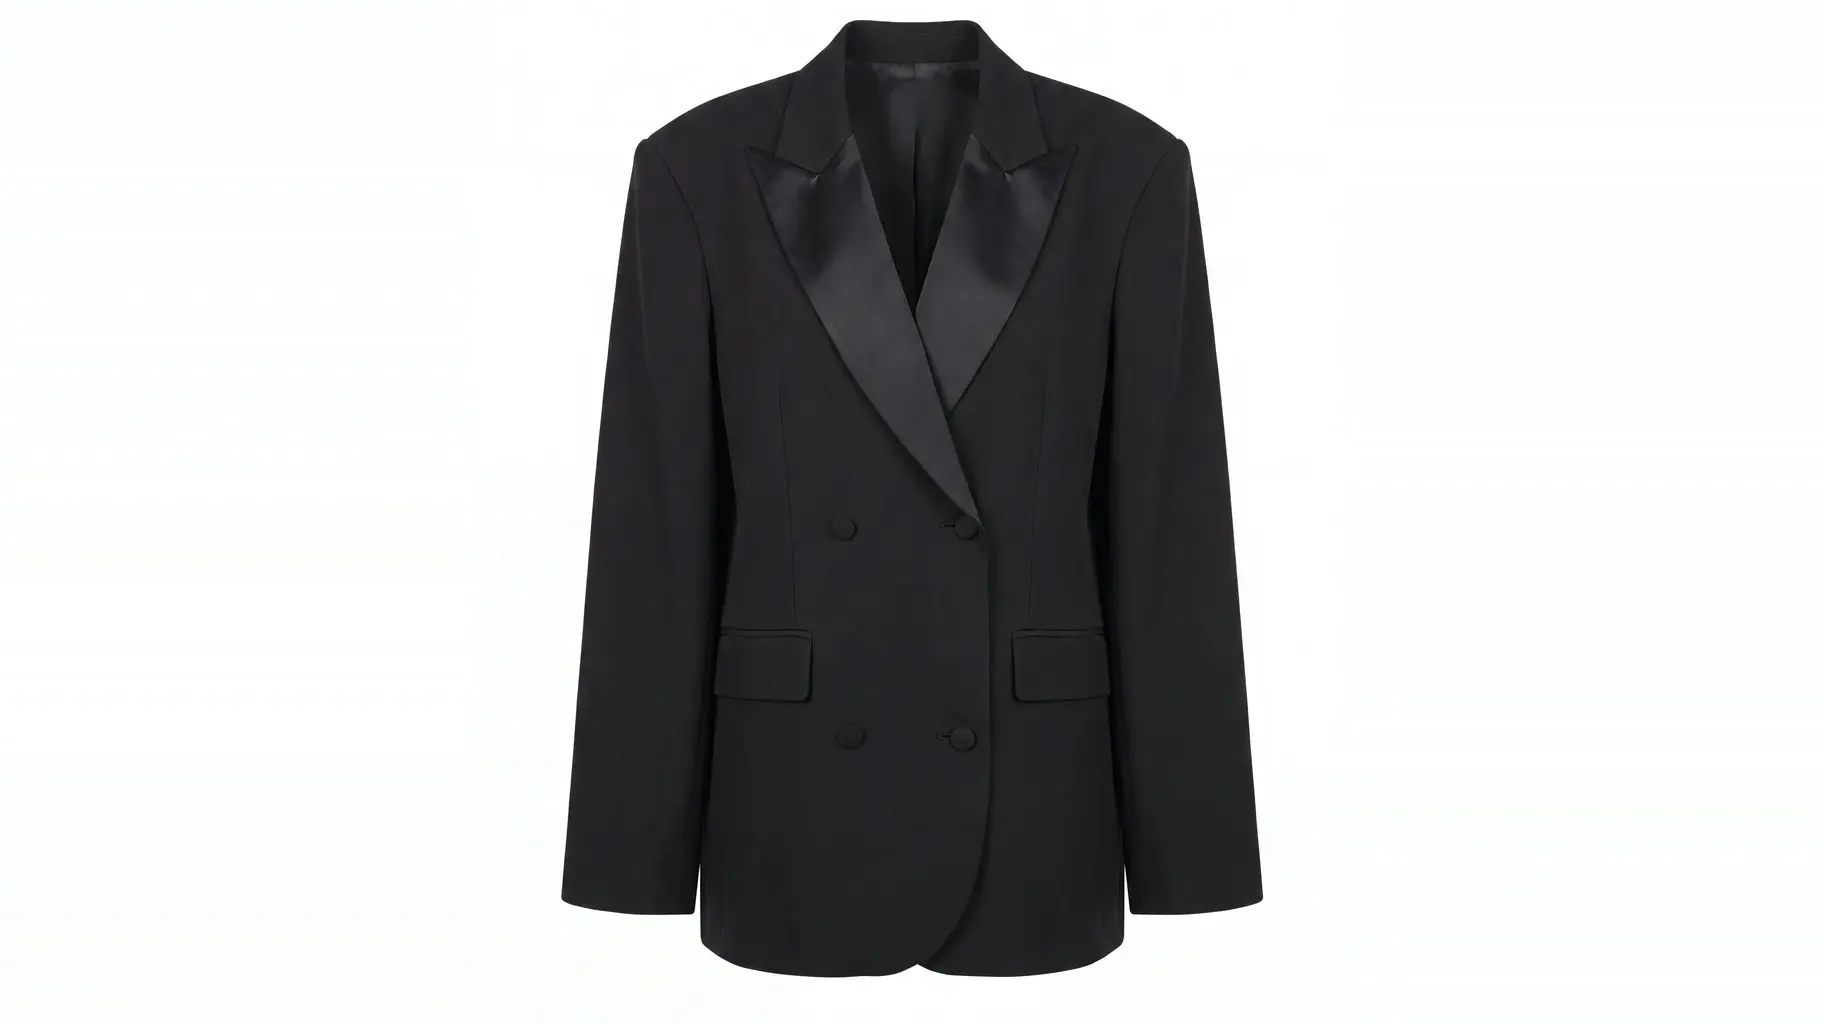
If you sell clothes online, you’ve seen the effect a thousand times without knowing its name: the garment with volume, as if someone were wearing it, but with no body inside. It floats on a white background and shows the inside of the collar, the fall of the sleeve, the real shape. That’s the invisible mannequin, also known as the ghost mannequin.
It’s been the de facto standard in fashion catalogs for years, and for good reasons. But it isn’t free and it doesn’t work for everything. Here’s how to do it properly, what it will cost you, and when you should look at something else.
What it is exactly
The idea is simple to explain and deceptively laborious to execute: you photograph the garment on a mannequin, then remove the mannequin in editing. The result keeps the volume and shape a body gives it, without the distraction of a plastic mannequin or a person.
The key is that cutting around the outline isn’t enough. If you only erase what’s visible around it, the collar becomes a black hole and the garment reads like a sticker. A good effect shows the inside of the garment: the label, the collar seam, the fabric on the other side. That’s what gives it depth and what separates a professional photo from an improvised one.
How it’s done, step by step
1. Prep the garment
This step decides 70% of the result and it’s the one most often skipped. The garment has to be ironed or steamed, with no lint, no loose threads and no fold marks. In the final photo, on white and under good light, every wrinkle shows three times more than in person.
Use pins or clips at the back to fit the garment to the mannequin. Clothes hung on a generic mannequin almost never fit perfectly, and a sweatshirt that’s loose in the shoulders reads as a badly cut sweatshirt, not a badly chosen mannequin.
2. The main shot
Pin the garment to the mannequin, center it and shoot it from the front. You need even light from both sides so there are no harsh shadows on the background, and a white or light gray background that’s easy to cut out later.
Work on a tripod. This isn’t an aesthetic detail: you’ll need a second shot from exactly the same angle, and if you move the camera between the two, the images won’t line up.
3. The inside shot
Here’s the trick behind the whole method. You take the garment off the mannequin, turn it inside out or arrange it so the inside of the collar shows, and take a second photo from the same position.
That second image is what you’ll later use to fill the hole at the collar. Without it, there’s no invisible mannequin effect: there’s a cutout.
4. The edit
In Photoshop or whatever editor you use, the process is: cut the mannequin out of the main shot, bring in the inside shot as a layer underneath, and combine them so the collar reads as continuous. Then clean up the edges, match the light between the two layers and adjust the color so the garment comes out true.
An experienced editor does this in five to ten minutes per garment. An inexperienced one, in forty, with doubtful results.
What you need to do it
- A mannequin in the right size for your size range, ideally with detachable arms.
- Two light sources, continuous or flash, with diffusers, placed at the sides.
- A white background: a cyclorama, fabric or paper, always well lit and wrinkle-free.
- A tripod, non-negotiable.
- Editing software and someone who knows how to use it.
None of this is very expensive on its own. The real cost appears when you multiply the editing by the number of products.
The most common mistakes
Shadows on the background. If the light isn’t even, the cutout leaves a gray halo around the garment. It’s very noticeable on marketplaces, where everything sits on pure white.
Moving the camera between shots. The two layers don’t line up and the collar ends up offset. It’s the mistake that wastes the most editing time.
Dark garments on a white background. The high contrast creates harsh, unnatural edges. It helps to bring the background exposure down a notch and work the cutout more carefully.
A mannequin that isn’t the right size. The garment looks deformed. The customer doesn’t think “bad mannequin,” they think “bad fit,” and they don’t buy.
When it makes sense and when it doesn’t
The invisible mannequin is the best option when your priority is consistency and a white background: marketplaces like Amazon, wholesale catalogs, product pages where what matters is that the customer sees the garment without noise. If you sell on channels that require a white background, you practically have no alternative.
Still, it has three limits worth being clear about before you set up the whole operation.
It’s cold on purpose. It shows the garment, it doesn’t sell the look. No context, no attitude, no campaign. It works for the spec sheet, not for making anyone fall in love on Instagram.
It doesn’t scale well. Two shots and ten minutes of editing per product is fine for twenty garments. For a collection of two hundred SKUs with color variants, that math becomes a month of work.
It doesn’t show the real fit. A mannequin doesn’t have a person’s proportions. The garment has volume, yes, but the customer still doesn’t know how it looks on someone with their body, which is the doubt that holds back purchases the most and causes the most returns.
The alternatives
If the invisible mannequin doesn’t work for you, there are other ways to solve it. We compare them all in detail in clothing photos without a model, but here’s the summary:
A flat lay is cheaper and faster, but it loses the volume, which is exactly what the invisible mannequin is meant to solve.
AI-generated models go the opposite way: instead of taking the body out of the photo, they generate it. You start from the simple photos you already have and get the garment on a model, with real drape and in context. It solves the three limits above (it sells the look, scales to entire catalogs and shows the fit) in exchange for demanding something else: that the platform precisely respects your garment’s texture, color and shape. We cover it in AI models for clothing.
In practice, many brands end up combining both: invisible mannequin for marketplace listings where a white background is mandatory, and AI production for lookbooks, campaigns and ads, which is where the sale is won.
What it looks like with Curva
In Curva you upload the photos you already have of your garments (even a mannequin shot or a flat lay), define your brand’s style once, and produce photos and videos of the whole collection ready to publish. No studio, no shoot and no waiting on anyone’s schedule.
If you’re building your catalog now, start now and try it with your own garments.